What's Stampaganza you ask?
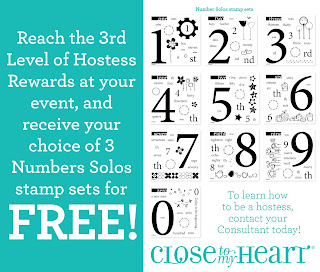

During July, buy any two My Acrylix® stamp sets at the full retail price and get a third stamp set of equal or lesser value free! Choose from stamp sets in the current Annual Inspirations or Seasonal Expressions 2, plus the popular Solos number and letter stamp sets that we've brought back just for July! Solos stamp sets can also be purchased in two different bundles, one for letters and one for numbers, for even more savings!

Or, you could sign up to be a consultant on my team and take advantage of this offer.

If you have questions, please call me 503-708-6889 or email me at jwilson@bctonline.com
Happy Scrappin'
Janice


 . Our goal this month is to remind you just how handy these tools can be in creating beautiful artwork that is versatile and, dare we say it—