Showing posts with label Friends. Show all posts

Tuesday, July 18, 2017

3rd Annual Crop 4 Vets....................

That's right September 23rd is the date.  

VFW 1324 Auxiliary is hosting our 3rd Annual
Scrapbooking
CROP 4 VETS
Saturday, September 23, 2017

104 S. Tumwater Dr., Oregon City, OR

 ~ 9am - 9pm ~

A “scrapbook crop” refers to a group of people who come together to work on their picture scrapbooks, sharing a common space and ideas at the same time. Don’t scrapbook, that’s ok, if you make cards, crochet, knit, bead, make jewelry or some other type of craft you are welcome too. 100% of all proceeds from event fees go to the Auxiliary programs to help our Veterans, local Military and their families in need!

Join us for 12 hours of fun and creativity! Simply bring the projects you are working on and enjoy a minimum of 4 feet of table space along with friendly conversation in a well-lit, drama-free space all for just $30.00.   Please bring your favorite dish to share with others for our pot luck style lunch and dinner.  I will let all attendees know how many participants will be there. 

There will be a silent auction, Door prizes, a *scrapbooking class, and a *card class (*additional fees apply). We will also have a beginner - Advanced Cricut Class. You will even have a chance to earn more tickets and win more prizes.

Raffle Tickets! Earn tickets for our grand prize drawing.
• Every person that arrives by 10 am will start the day off with (2) raffle tickets.
• Bring a Personal Hygiene product and receive (1) raffle ticket per item, (limit 10 tickets)!
• Make a scrapbook layout for our Auxiliary and you will receive (5) tickets!
• Make cards for our Veterans and you will receive (1) ticket per card (NO limit)can be made in advance.
• Knit or Crochet a hat for our Veterans and receive (1) ticket per hat (limit 10 tickets)
Participate in our games and challenges and earn even more tickets. Tickets may also be purchased.

We will open at 9:00 am and close at 9:00 pm

Each person will get a ticket for coming and may earn even more tickets throughout the event. You can earn tickets by bringing Personal Hygiene products (Listed below), making pages for our Auxiliary Scrapbooks, making cards for our military and Veterans and participating in games and challenges.

Personal Hygiene products; *Bars of soap - *Liquid dish soap - *Tooth brush - *Tooth paste - *Disposable razors - *Shaving cream - *Deodorant - *Toilet Paper -- *Shampoo  

*** Note Tooth brushes should be individually wrapped, only small containers of liquid dish soap and laundry soap as we cannot repackage them. Donations of these items are always welcome. Thanks for your understanding.

Also the VFW 1324 & Auxiliary have adopted another Unit at Camp Whithycombe in Clackamas OR. Most of this unit has been deployed over seas 3 or more times each. I recently met their Family coordinator. Juel is one amazing lady. She also works with Soldiers Angles. I invited her to the Crop 4 Vets and was telling her about some of the things that we do at the crop. She said she needed to send some cards to her soldiers. So, who wants to help make cards for our soldiers who are deployed to let them know we still care and appreciate all that they do?
She will take cards addressed to the troops with encouragement, support and especially any personal note or story. I have Marines, Army, Navy and Air Force --- so addressing the cards to "service member" is helpful.
I know that there cannot be glitter on the cards unless it has a clear glue over top so it can not come off. We don't want to put them in harms way.
Start now and bring them to the Crop 4 Vets or you may drop them by the VFW Post 1324 on any Friday evening from 5-8 pm.

I hope you will join me in making some of these cards.  

Here is a link to the Crop 4 Vets Event page where you can sign up to join us or bring the cards.  https://www.facebook.com/events/1968646266749783/permalink/1969049690042774/?notif_t=like&notif_id=1500247865858404

If you would like to mail the cards please contact me for an address to send them.  

Happy Scrappin',

Janice

Saturday, January 7, 2017

Crop 4 Vets!!!

Have I mentioned that in just over a month The VFW Post 1324 Auxiliary will be hosting a Crop 4 Vets?  February 11th, from 9 am till 9 pm.  104 S. Tumwater Dr., Oregon City, OR 97045

That's right, we will be hosting a Crop 4 Vets to raise money to help more veterans.  I am so excited because this is the first of 2 Crops for this new year. That's right, we had several Croppers who couldn't attend the last one and we were asked if we could host another one so more Croppers could attend.  I hope you can join us.  We have lots of prizes too.


If you need an application or more information, please call me 503-708-6889 or email me at jwilson@bctonline.com  Click here to go to our Crop 4 Vets Facebook Event Page

Happy Scrappin',

Janice

Saturday, August 13, 2016

This weeks featured product is...........


SEA GLASS GLITTER PAPER!


As you know, Sea Glass is our 'Color of the Year' this year at Close to My Heart! 
The Glitter Paper is BEAUTIFUL!!! 
Make sure you add it to an order this week! The item # is Z3240 and it's just $5.95.
 Here are a few samples from my CTMH Sisters.

Sweet Birthday Item Number: B1532 just $9.95

 These sample below is using the new Thin Cut dies with the glitter paper. 

Thin Cuts—Hello & Thanks Item Number: Z3259 just $11.95


This one is from the Flower Market Cricut Cartridge, Sea glass glitter paper and  Rustic Home Fundamentals Paper Pack ($13.95).  

 So head on over to my website and join the Hot August Nights gathering to place your order.

If you have samples to share I would love to see what you make.

Happy Scrappin',

Janice

Wednesday, April 16, 2014

Please wear RED on Fridays.


R = Remember  E = Everybody    D = Deployed

Wearing red on Friday's shows your support for our Military Members who are deployed. You can show your support even if you are not related to them or know them in some way.  We will be wearing RED on Fridays until all deployed are home.

If you would like, you can take a picture of yourself wearing RED on Fridays and post them here https://www.facebook.com/SoldiersAngelsOfficial

Thanks in advance for supporting our Deployed Military Members.

Happy Scrappin',

Janice

Saturday, February 8, 2014

My Friend is having a Thirty One party.

This is the February sale that is going on now.  

If you wish to place an order click on this link; http://www.mythirtyone.com/shop/catalog.aspx?eventId=E4179054&from=DIRECTLINK  Find Christina's party and click on shop now at the far right side of the screen. The party closes on February 15th.   

You can host your own party and earn free products too.  Just follow the link and click on Let's Party and scroll to the bottom of the page and choose what kind of party you want to host. 

I have several Thirty One bags and I love them.  I use them to carry all kinds of things including my Paparazzi Jewelry.  I use one of the Organizing Utility totes to hold all my Paparazzi business supplies for when I do parties.  I use the large utility tote to carry all my Necklace Display boards.  It holds all 3 plus I have room to put my Hair Clips display board in too.

Happy Scrappin',

Janice

Thursday, November 28, 2013

Happy Thanksgiving!!!

I hope everyone is enjoying their Family and Friends.  I know I am.

I haven't joined in on the 30 days of sharing why you are thankful, but I am truly thankful for my Family and Friends, that includes you, my followers.  

I am thankful that I get to see my grandchildren every day. 
I am thankful that I am married to my best friend who supports me in all my adventures, eventually.  
I am thankful for my children who help me with just about any thing I need. 
I am thankful that I am still pain free, 3 years now.  
I am thankful for my family who live near and far.
I am thankful for my friends who keep me sane.
I am thankful for all my followers who keep me excited about what I do and encourage me to continue.  
I am thankful my Mother taught me to cook, sew, and craft.

Again Happy Thanksgiving!!!

Janice


Monday, August 12, 2013

Mixed Media Art Canvas for last Saturday's Class.

Here are the samples that I created for the Mixed Media canvas class I taught on Saturday.

When I created this one I knew I wanted to use the Gears from the Artiste Cricut Cartridge and I knew I wanted them to look old and rusty.  I found a Gear stencil on Amazon.com and purchased it for this project.  I first started by printing the picture out on printer paper.  I then used Mod Podge to glue the picture face down to the canvas.  If you choose to follow my directions DO NOT add Mod Podge to the top of the picture. I wiped the excess Mod Podge off the canvas with a damp cloth.  I used a heat gun too dry the Mod Podge.  Once the canvas was dry I spritzed it with water and gently rubbed the paper off leaving the picture.  The image that it leaves is grainy because it is on the canvas.  I liked the results, but then I spritzed Slate Gray ink over Jordan's face, that is why I covered it with an actual picture.  If you like the look of a clear picture, this technique probably is not the look you will like.

I used CTMH's inks and Acrylic paint to sponge different colors on top of each other. It became really dark so I used some Gesso to cover and lighten it up, then I added color back into the area I thought was too light.  I cut the gears on the Cricut from the Artiste Cricut Cartridge I cut some from Chipboard and some I welded in the Cricut Design Studio and cut out of paper.  I sponged paint and ink to the gears and I also covered 2 of the gears in Liquid Glass and let them dry. Then I added the chipboard gears and the paper gears to the canvas.  I then layered the picture onto the Whisper cardstock and adhered it to the canvas.  I love how this turned out.

With the second one, I used Texture paste and stencils, ink and acrylic paint.  The peacock feathers are first done in texture paste then I sponged green paint over them and then I decided to add the brown with a marker to highlight the feathers.   You can't see all the texture on the canvas but there are layers upon layers of sponging and texture.  I punched out butterflies and stamped a close pattern on them.  I cut the roses from the Artbooking Cricut cartridge and curled them with CTMH's Quilling tool and glued them in place.  I cut 2 sizes of the other flowers and layered them after I used the Sizzix Susan's Garden Tool Kit for sculpting the flowers.
I added the yellow stars to the centers to finish them off.  I cut 2 intricate swirly designs from the Artbooking cricut cartridge, one in Lagoon and one in Gypsy and placed them on the canvas.  I backed the pictures of Hailey giving me a pedicure in Black and then in Gypsy and used 2 layers of foam tape to pop them up off the canvas.  In the lower right corner I added some black tulle, a Olive swirl and some bling.  I added 3mm flat back pearls to the scallop edge of the picture and on the butterflies.

I had 4 ladies take the class on Saturday and here are their canvases.  I love how each one is different and very creative.  I had the ladies practice with the paint and texture paste on scrap paper before they started on their canvases.  Liz even used paint with a stamp and stamped the swirls on the left side of the picture.  She added texture paste over the teal paint.   
 Karen brought her own stencils and used them.  She decided she wanted to experience the whole technique so she actually glued the picture to the canvas and after adding the texture paste she decided she wanted to add an actual picture where she used Gesso to cover the image.  I cut some gears out for her to use on the canvas also.  You will be seeing more of Karen's artwork as she joined my CTMH Scraptastic Treasures' Team.  Welcome to the team Karen.
 Heather used Red and Blue paint and sponged it on the canvas, then added texture paste to the center of the canvas and then painted it Yellow.  She Sponged red paint over the gears stencil and I cut out gears from the Artiste cricut cartridge.  She added green brads to the gears and popped them up on foam tape.  She backed the picture and placed it on the yellow texture.
Stacy added texture paste with a leaf stencil to the corners of her canvas and painted then added color on top of the leaves to bring all the colors together.  I cut Dragonflies from the Art Philosophy Cricut cartridge.  Stacy stamped an image in Chocolate ink on Daisy White cardstock and I cut the
overlay dragonfly image and then cut the main dragonfly base from Creme Brulee cardstock Stacy glued them together with liquid glass and adhered them to the canvas. We cut the word Live out in two sizes from the Artiste Cricut Cartridge and she used the larger L and the smaller "ive" then added a small heart, that we also cut from the Artiste cartridge, over the i to make it L♥ve.  Stacy then added Liquid Glass to the heart to make it shine.  We cut 3 rolled roses from the White cardstock that she had stamp in chocolate and she placed them on the canvas.  She forgot to bring her picture but knows where she wanted to place it when she returned home.
 They all turned out so cool.  Now I have lots of ideas to use on the other 2 canvases I plan on creating watch for those in the coming weeks.

I enjoyed teaching the class on Saturday, meeting new people and sharing ideas.

On Sunday, I was just getting ready to unload the van from the night before and the house phone rang.  It was my friend Jeannie.  I haven't heard from her in months and was so excited.  She asked what I had been up to and so I told her about my canvas class and she wanted to take the next one.  She asked if we could do the class at my home.  Of course I said yes!  
The canvas below is the one my friend Jeanie created at my house on Sunday.  She used a page from a magazine and a picture.  She glued the picture to the canvas and rubbed off the paper.  then painted around it.  Jeanie added texture and sponged over stencils, she also spritzed ink onto the canvas over the gears.  Jeanie stamped the swirls onto the magazine page and glued them to the canvas with Mod Podge.  This is kind of dark but we both liked it when she was finished.
.
It was so good to see her again.  I had such a great weekend.  

Watch for more artwork coming soon, as I am working on projects for the Clark County Women's Expo. in Ridgefield WA.  September 14th & 15th.  

Happy Scrappin',

Janice


Thursday, July 18, 2013

Another Pajama Party!


Close To My Heart is teaming up with Big Picture Classes again to bring you a live webcast with step-by-step instructions for making this layout using the Cricut® Artbooking collection. Purchase the collection beginning August 1, 2013 and revolutionize the way you scrapbook!
The FREE webcast will air Wednesday, July 31 at 7:00 pm (MDT). During the presentation, you’ll learn to make several projects from a variety of sponsors, including Close To My Heart’s Artbooking layout, as our very own Kristine Widtfeldt walks you through the steps—and sneaks the Artbooking collection!
The Pajama Party class will be available for FREE at BigPictureClasses.com on July 31, and will be archived after the event for future viewing. If you would like to interact on the message board, participate in live chat, post to the gallery, download handouts, or enter any contests, you will need to log in to the Pajama Party “classroom” by creating a free account on the Big Picture Classes website. If you have already created an account or if you registered for the first Pajama Party in May, you are all set! You will not need to create another account or register again.
To make our Artbooking layout, you will want to have the following items—or similar products—on hand:

  • Z1906 Cricut® Artbooking Collection*
  • 1301 Bamboo Cardstock
  • 1388 Colonial White Cardstock
  • X5668 Honey Cardstock
  • X5762 Lagoon Cardstock
  • X5930 Slate Cardstock
  • X5639 Sweet Leaf Cardstock
  • X5666 Twilight Cardstock
  • Z2160 Twilight Exclusive Inks® Pad
  • Z2173 Slate Exclusive Inks® Pad
  • Z1853 Aqua Dots*
  • Z1799 Silver Shimmer Trim
  • Z1151 3-D Foam Tape
  • Z1294 Sanding Kit
*These products will be available to purchase beginning August 1, 2013.


Watch the Pajama Party by yourself or with your friends for a fun crafting experience. Anyone with an Internet connection can watch, so be sure to tell your friends to order their project supplies in advance and then tune in!

Thursday, July 11, 2013

The gratitude campaign (short video)


I just found this and wanted to share it with you.


Notes From A Veteran: News And Information At The Veterans Site
12182 15 5 34 

THE SIGN: A WAY TO SAY THANKS TO OUR SERVICEMEN AND WOMEN


I received this in a forwarded message from a friend. He says that this "gesture" was started by someone in Seattle, Washington and that it is becoming a universal way to communicate our thanks to our servicemen and women when we see them in public.
It is a very simple, but very meaningful, and self-explanatory gesture. There is no mistaking what it means. If you have felt awkward, or shy about going up to our military members in uniform, this is a great way overcome your hesitation. You need not exchange words, just offer this universal gesture of thanks. It will be appreciated by those who have served and suffered on our behalf. You will feel good for having done it too. Try it next time you see one our soldiers, sailors, airmen, Coast Guardsmen, or Marines in uniform. This is a simple, but very moving act.
Let's show our servicemen and women, through this simple gesture, that we appreciate the great service and the sacrifices they have endured on behalf of all of us.
Happy Scrappin', 
Janice

Tuesday, June 4, 2013

Up date on the "Red Cross Tornado Relief" on-line Gathering on my website,

I'm saddened to say that no one took the opportunity to participate in the "Red Cross Tornado Relief" on-line Gathering on my website.  So I was not able to donate to the relief as of yet.  The  "Red Cross Tornado Relief" on-line Gathering is just a place for me to keep track of the purchases that are going toward the relief.  All orders ship out immediately and directly to you.  You don't have to wait till the gathering closes to get your order.  


There are several specials going on this month,Let's Get Patriotic, Make It A Banner Day, "Thank you"& Flowering Bunch. So, I am going to set up another "Red Cross Tornado Relief" this time with a Mystery Hostess Online gathering and I will be donating 10% of my commission from sales made from  June 4th through June 30, 2013 to the Red Cross.  Plus one lucky customer will be chosen to be the Mystery Hostess and they will receive $25.00 in FREE Close To My Heart select products.  When shopping, make sure you select Join the "Red Cross Relief" With Mystery Hostess Online Gathering to have your purchase count and I encourage you to purchase a "Thank you" stamp for yourself and an additional stamp for a friend.  The order will be sent directly to you.  While you are there, make sure to take advantage of the Stamp of the month Flowering Bunch!  I will report back on the 1st of July as to how many stamps I have sold as well as the amount generated through my commission that will be donated to the American Red Cross! I will also announce the one lucky Mystery Hostess.   My thanks in advance to each of you!  

I'm off to place my order for the Patriotic  and Thank You stamps.  


And just maybe get my Banner for FREE!!!


Happy Scrapin', 

Janice


Monday, May 13, 2013

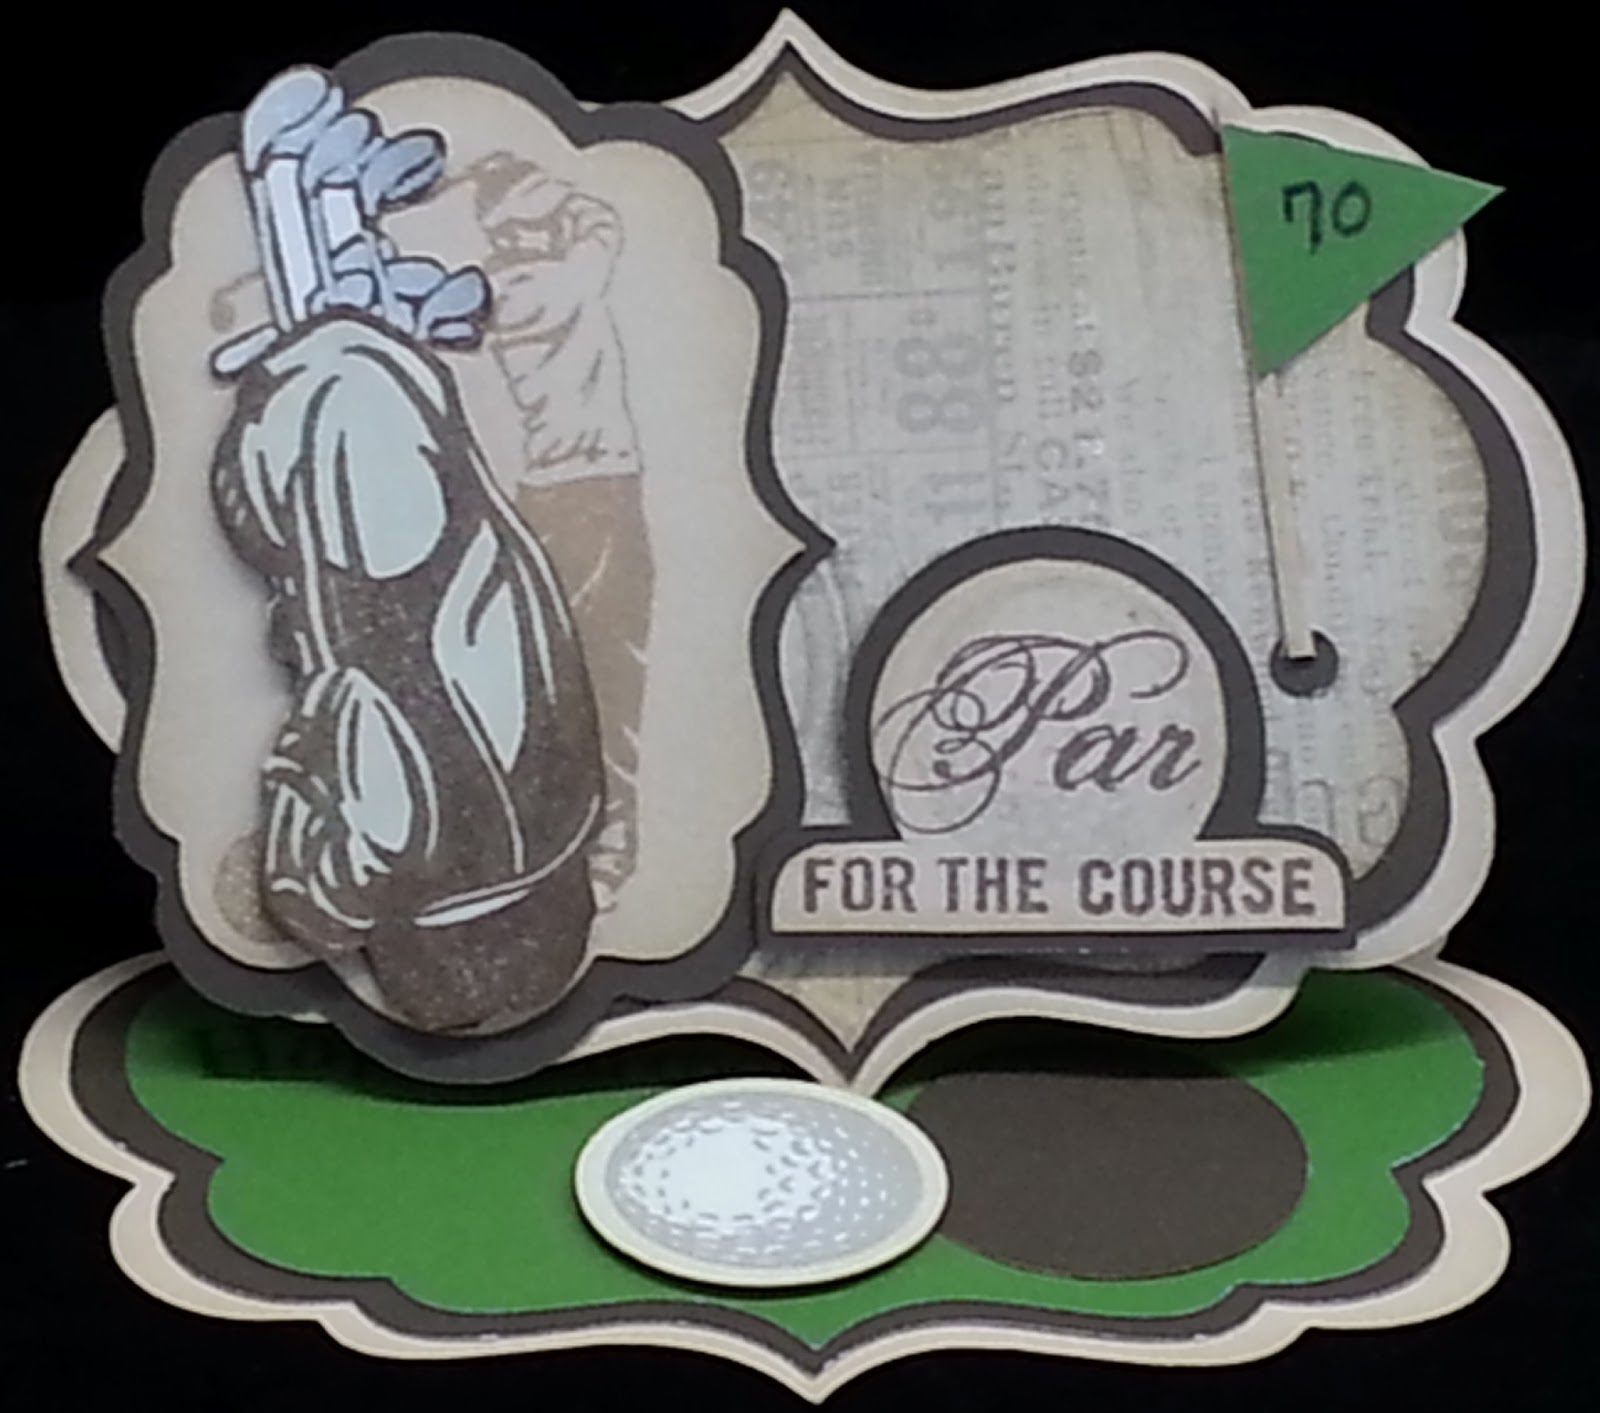
Saturday, my friend celebrated his 70th birthday.

Of course I had to make a card.  Lee loves to play Golf and I bought a golf stamp set called Tee Time, a few years back to make cards for him and never used it until now.  I went onto Splitcoaststampers.com to get some ideas of what I wanted to make.  I searched for golf cards and 70th birthday cards and found a card posted by rdm, that I had to make.  I get a little ornery sometimes and this was one of them. This is not a normal card, it is an according card, about 5 feet long.  Here are the pictures.

 I used Buzz and Bumble paper pack with Colonial White, Cocoa, Sky and Champagne cardstock. Cocoa, Slate and Bamboo ink.  I used the Art Philosophy and Artiste Cricut Cartridges.  I used Color ready seam binding and glitter brads.  I used a mini super strong magnet for the closure on the box. I used CTMH's silver marker for the club heads.  I used SU's Blossom Petals Punch and made a cut file for the flames.  I sponged the edges of the flames with Honey ink and added Stickles to the centers after I layered the small flame over the large flame.
Here the card is with the custom box to hold it.
 There are 70 candles on this card.  Here is the link for the instructions that I followed to make the card.  http://www.mixed-up.com/mary/morestuff/50-Candled_Card_Construction658.jpg

Miss Hailey came home from School Friday and found me in the stamp room working on the card.  She asked me what I was doing, I showed her the card, which was about 1/2 way done and she asked me how many candles I was putting on the card.  I said 70.  Hailey asked why?  I told her that it was my friend Lee's 70th birthday and she exclaimed "He's going to be a Zombie soon."  


Lee loved the card.  He came over and thanked me for the card and gave me a big hug.  I told him next year I'm just going to bring him a candle and he can start putting them on the back side.  


Of course I had to tell him about the conversation I had with Miss Hailey.  I think Lee loved the story as much as the card. 

I made a second card in-case I liked it better.  Here are the pictures of it.
It is an easel card and I can change the flag if I want to.
I used the same paper pack but changed the Sky cardstock to Topiary.  The Buzz and Bumble paper pack is one of my favorite because of the vintage look.

I hope this inspires you to make one of either of the cards and if you do, please leave me a comment and a link to your card so I can see it.

Happy Scrappin',

Janice

Wednesday, May 8, 2013

Canvas Art Class for $10.00, Saturday May 18, 2013.

Hi everyone,

I decided that I would teach a Canvas Art class on Saturday May 18, 2013.  Here is the project we will be doing.  I hope you will join me for the class.

I choose pictures that were too large to add embellishments so I will be making more and choosing pics with subjects a little farther back.  I didn't get all the wrinkles out either.
They look better in person than in this pic.  It was a lot of fun trying to figure out how to add a photo to the canvas.  I tried several things and this was the best way that I could find.  It took me all day to get this done too.

Happy Scrappin',

Janice


Tuesday, May 7, 2013

Cinco de Mayo Bunco Celebration.

I have been busy the last couple weeks getting ready to host my Bunco Group on May 4th.  I made party hats for everyone to wear.   I had fake mustaches for everyone to mark their cups so they knew who's was who's. 
 I painted 2 signs to show everyone where to go for my Bunco party. I'm not much of an artist but I think you can tell what it is supposed to be.

I made a large Balloon Cactus sculpture so everyone would know they were at the right place.  I used an old Card Rack and my DH gave me some metal pipes that were bent so I could make the arms. It took 90 balloons to create this.  Thank you Dawn and Charlie for blowing up the balloons for me. Thank you Hailey and Mary for handing the balloons to me so I didn't have to let go.  I put this together in my Living room and Charlie was laughing because I then had to get it out side somehow.  I was afraid that I wouldn't be able to put it out because the wind was howling all day but calmed down just in time for me to put it out before my guests started to arrive.
 I researched and found a great recipe for Chicken Enchiladas(recipe below) I even made Gluten Free Flour Tortillas.  I found most of these recipes on Pinterest then changed them to my liking.
GF Chicken Enchiladas
Prep Time: 15 Minutes
Cook Time: 15 Minutes
Total Time: 30 Minutes

Ingredients:
2 Tablespoons Olive oil
1 Large Sweet Onion diced
3 Cloves Garlic minced (I used a Garlic press)
3 Chicken Breasts, cooked and shredded
1 can (14.5-ounces) Diced Tomatoes
½ cup Sour Cream
1 (4-Onuce) can diced Green Chili peppers (they are not hot)
½ teaspoon Dried Oregano
1 teaspoon Dried Sweet Basil
½ teaspoon Chili powder
½ teaspoon ground Cumin
½ teaspoon Salt
¼ teaspoon Black Pepper
2 cups Shredded Cheddar Cheese
8 – 10 (8-inch) Gluten Free Flour Tortillas (Recipe Below)
1 (15 Oz) Enchilada Sauce

Instructions:
·         Preheat Oven to 350 degrees.
·         Grease a 13” X 9” baking Dish with Cooking Spray and set aside.
·         Heat Olive Oil over Medium Heat in a large skillet.
·         Add onions and cook for 3 minutes.
·         Stir in Garlic and continue to cook for 1 minute.
·         Add in Chicken, diced Tomatoes, Green chilies, and Sour Cream; season with Oregano, Basil, Chili powder, Cumin and Salt and Pepper.
·         Cook for 5 Minutes or till heated through.
·         Mix in ½ of the shredded Cheddar Cheese.
·         Spoon mixture down the center of each of the GF Flour Tortillas and rollup.
·         Place seam side down in prepared baking dish.
·         Bake for 10 minutes.
·         Top with Enchilada Sauce and shredded Cheddar Cheese.
·         Return to oven and bake for 5 – 10 minutes or until cheese is melted.
·         Serve warm.

Gluten Free Flour Tortillas

Ingredients:
2 ½ Cups Gluten Free All Purpose Flour
2 teaspoons Xanthan Gum
1 teaspoon Sea Salt
2 Tablespoons Olive Oil
1 – 1 ¼ cup of warm water (about 100 degrees)

Instructions:
1.      To make tortillas, place flour, Xanthan Gum, and salt in large mixing bowl and mix well.
2.      Add 4 teaspoons of Olive Oil and stir to combine.
3.      Pour warm water in small increments and stirring to combine.
4.      Press dough together with wet hands and divide into 8 pieces.
5.      Roll each piece separately between 2 pieces of Plastic wrap until about 1/8” thick and 8” wide. (You can use a Tortilla Press if you have one.
6.      Heat a Large Cast Iron (or Non Stick) Skillet until hot.
7.      Place 1 raw Tortilla on the skillet at a time and cook for 45 – 60 seconds or until slightly charred on the bottom. (You’re better off under cooking than over cooking them because they won’t be pliable.)
8.       Flip tortilla with a heat proof Spatula and cook for another 30 – 45 seconds.
Remove from pan and place on plate continue till all tortillas are cook

Baked Cinnamon Chips with Strawberry Salsa
Baked Cinnamon Chips  
3 Gluten Free Flour Tortillas about 6"
3 tablespoons melted Butter
1 tablespoon Cinnamon
1/2 cup Sugar
Strawberry Salsa
6-8 Fresh ripe Strawberries Diced
1/2 cup chopped Pineapple chunks
2 tablespoons Sugar
1/4 cup dark chocolate 
1/4 teaspoon Olive oil
Whipped Cream
  1. Preheat oven to 350 drgrees.
  2. Brush melted Butter on one side of each Tortilla.
  3. Mix Sugar and Cinnamon and sprinkle on the Buttered side of each tortilla.
  4. Use a pizza cutter or large knife to cut the tortillas into 8 wedges.
  5. Place tortilla wedges on an ungreased cookie sheet sugar side up.
  6. Bake them in the oven for 10-12 minutes or until edges curl up.
  7. Remove from Oven and let cool.
  8. Place Chips on a platter.
Strawberry Salsa  
  1. Mix Strawberries, Pineapple and sugar. (I made this a head and had it in the fridge until I was ready to serve my guests, then I put it together.)
  2. Sprinkle Strawberry mix over the chips.
  3. Melt the Dark chocolate and the 1/4 teaspoon Olive oil in the microwave 1 minute at a time stirring regularly until desired consistency.
  4. Drizzle the chocolate over the Strawberries and chips.  ( I drizzled the chips before and after adding the strawberries.)
  5. Add a few dollops of Shipped Cream and serve.


Cranberry-Strawberry Margarita Punch


Ingredients:
6 Cups Cranberry Strawberry Juice Cocktail ( you can use Cran-Raspberry or any other one too)
2 cups water
3/4 cup frozen Limeade Concentrate ( From 6 oz Can)
1/4 cup Frozen Orange juice concentrate (From 6 oz Can)
Lime slices
Rim salt
1 cup Tequila to spike the whole batch (optional)

Instructions:
  1. Mix all ingredients in a 1 gallon insulated beverage container.
  2. Salt rim of glass.
  3. Serve over ice if desired.  ( you can blend this also.)
  4. Garnish with Lime slices.


Strawberry Margarita Cupcakes

  They smell so good. I might have to make a gluten free version soon. (recipe below)

Strawberry Margarita Cupcakes


Cupcakes Ingredients:
1 Box Betty Crocker Super Moist White cake mix
1 cup bottled Strawberry Margarita or Daiquiri mix
1/4 cup Tequila (Optional)
3 egg whites or whole eggs.

Frosting ingredients
1/2 cup shortening
1/2 cup Butter
5 1/2 cups Powered sugar
5 tablespoons bottled Strawberry Margarita or Daiquiri mix.
1 Tablespoon Tequila (Optional)

Garnish:
12 Slices Lime, each cut in half.

Directions:
  1. Preheat Oven to 350 degrees (325 for dark or non stick pans)
  2. Place paper or foil baking cups in each of 24 regular sized muffin cups.
  3. In large bowl, beat all cupcake ingredients an electric mixer on low speed for 30 seconds.  Beat on medium speed for 2 minutes, scraping sides of bowl occasionally.( I beat them on High speed for 2 minutes because it makes a fluffier cake)
  4. Divide batter among muffin cups.
  5. Bake 18 - 23 minutes or until a tooth pic inserted in the center comes out clean.
  6. Cool 10 minutes remove cupcakes from pans to cooling rack.  Cool completely.
  7. In a large mixing bowl, beat shortening and butter with an electric mixer on low speed until smooth.
  8. Gradually add powdered sugar, 1 cup at a time, beating until combined.
  9. Add 1 tablespoon at a time of the bottled Strawberry Margarita or Daiquiri mix, beat until well blended. 
  10. Add tequila now if you want to add it, but substitute it for 1 tablespoon of the Margarita Mix.
  11. Beat frosting until it is light and fluffy..
  12. Spoon Frosting into a decorating bag fitted with a #1M Star tip, pipe frosting onto cupcakes in a circular pattern.
  13. Garnish with Lime slices.
I made fresh Avocado Salsa and Pico de Gallo too.  It was so good.  I realized tonight that I forgot to serve black olives with dinner. Bummer!!!!  I knew there was something missing, but I couldn't figure it out.

I hope you will let me know if you try any of these recipes. I would love to hear what you think about them and if you have a better recipe, I would love to have it.  I have my Avocado Salsa and Pico de Gallo recipe on the blog somewhere, if you want them just leave me a comment or send me an email letting me know you want them.

  It has been about 12 years since I have entertained friends in my home. I've always had too many people living here to be able to entertain.  I guess we could have had guest over in the yard. 

Happy Scrappin',

Janice