Thin Cuts come in a variety of shapes and sizes. Stars, hearts, circles, flowers, ovals, banners, tags, numbers, letters—just to name a few  . Our goal this month is to remind you just how handy these tools can be in creating beautiful artwork that is versatile and, dare we say it—Die-namite!
. Our goal this month is to remind you just how handy these tools can be in creating beautiful artwork that is versatile and, dare we say it—Die-namite!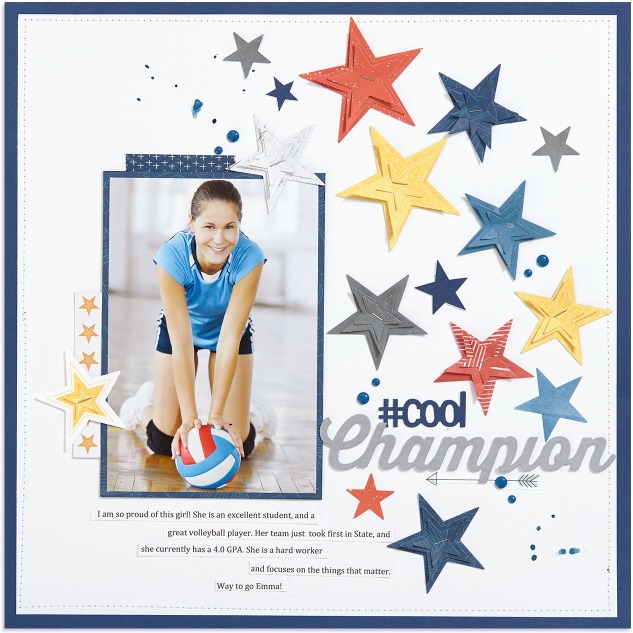
All of our basic shapes Thin Cuts come in a set of four dies ranging in size, from 1″ to 2½”. In the page above we used our Basic Stars Thin Cuts to create something that literally pops off the page.
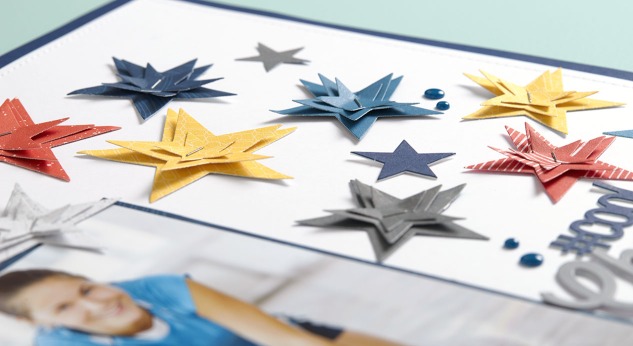
First we attached the largest stars to the page. You can use glue dots, thin 3-D foam tape, or both—which is what we did. Add the adhesive only to the center of the shape to keep it from going completely flat.
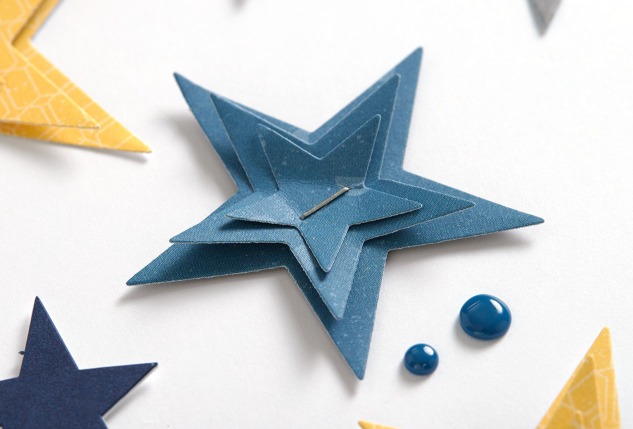
The smaller stars were stacked on top and then attached with a mini staple—not only functioning as an adhesive but as an added design element. You’ll notice that we only used three out of the four star sizes per stack. We found that doing more than three looked too bulky and didn’t visually work with our page. (If you remember from one of our previous posts, details in odd numbers look better than even!) Lastly, using nothing more than a finger, we lifted the corners up starting with the top layer.
Replicate this user-friendly technique with any of our basic shape Thin Cuts. If you want to achieve a similar effect with a Thin Cut that doesn’t come in a variety of sizes, follow the same steps and stack the same sized shapes on top of each other.
And don’t forget, our Thin Cuts are on sale this month! Save 25% on individual sets and 30% on select bundles! Click here to shop!
Recipe
12″ x 12″ #cool Champion Page
X7229B Stargazer Paper Packet, Z3351 Adventure Fundamental Paper Packet, 1385 White Daisy Cardstock, X5957 Sapphire Cardstock, X7229C Stargazer Complements, Z3356 All-Star Complements, Z4143 Stargazer Dots, Z3329 Thin Cuts—Basic Stars, Z3132 Watercolor Paints, Z3188 Paintbrush Set, Z2027 Mini Stapler, Sewing Machine
X7229B Stargazer Paper Packet, Z3351 Adventure Fundamental Paper Packet, 1385 White Daisy Cardstock, X5957 Sapphire Cardstock, X7229C Stargazer Complements, Z3356 All-Star Complements, Z4143 Stargazer Dots, Z3329 Thin Cuts—Basic Stars, Z3132 Watercolor Paints, Z3188 Paintbrush Set, Z2027 Mini Stapler, Sewing Machine
You can get more great ideas here https://blog.closetomyheart.com/
If you would like more information on our March special, Die-namite, click here https://janicewilson.closetomyheart.com/ctmh/promotions/campaigns/1803-die-namite.aspx
Happy Scrappin',
Janice


